Wednesday, January 16, 2013

Tips, Tricks & (photography) freebies from around the web!


+Clickin Moms have an awesome giveaway this morning....


follow this link to enter, or find them on facebook!
 http://www.clickinmoms.com/cm-2013-giveaway-and-digital-gift-pack/


Creative Motion Design

Are having a 90% off sale on their fantastic photography learning guides.

http://bp4u-photography-tips-guides.myshopify.com/


  1. Photo: Can you say Deal-O-Rama? BP4U Photography Tips & Guides sure can...Check out the amazing sale on some of the Best products and guides in the industry...
Click here to save BIG time--> http://bit.ly/Zv33Pm


Tips For Selling Your Photography

By: Mike Brown

You’ve got the camera, you’ve taken some classes, and you’re ready to turn your love of photography into a gold mine. Or, are you?

Selling your photography
From the earliest beginnings of modern photography, photographers have been on a mission to turn the images they create into money. While many have been successful in doing so, many have struggled to survive in a market that is becoming more competitive everyday. The advent of the digital camera, in conjunction with the digital darkroom, now available on your home computer, has made it easier than ever to create and share images. You don’t even have to mix chemicals.

For many, creating for creation’s sake isn’t enough; the lure of selling your art is strong. Others do it; why can’t you?

You can! Here are some tips from someone who has traveled the rough road of the business end of photography.

- Presentation vs. Representation

We’ve all done it, we’re all guilty; at some point, we have shown our glitziest, most bedazzling photographs to lure potential clients. While there is nothing wrong with showcasing your abilities, you’ll be doing yourself, and your client, a favor by showing them a broad spectrum of your work. Don’t be afraid to show the range of what you’ll likely be offering to a client. Remember, all they will have to use in their decision-making process is your presentation, so make sure your presentation is a good representation of your work. If all they get to see is your best work, then you should be prepared to produce your best work for every job you get, because…

- Expect Expectations!

The best intentions can be ripped to shreds by a difference in the expectations of a client and what the photographer actually produces. It’s so important to openly and honestly communicate with your clients. Don’t leave anything to chance. They pay you, and entrust you, to provide a service for them, and they likely have a resulting vision in mind. Try and find out exactly what their vision of the finished product is. Be honest about what your capabilities are and the timelines in which you can deliver them. You’re better off losing a client to an honest presentation before a job than losing a client after a shoot because of miscommunications.

- Expect the Unexpected!

Being organized and prepared for anything will prepare you for the monkey-wrenches that will inevitably be thrown into your plan. Have back-up plans, back-up locations, if needed. Carry redundant equipment and memory cards. As advanced as some of today’s photographic technology has become, the unfortunate truth is failures in the system happen. Be ready to react and carry on.
…
…
- Explore the Terrain!
How much do you charge? What is your time worth? There is no set-in-stone answer to these questions. However, somewhere between the extremes of “too much” and “not enough” is a median. You can pin-down what kind of investment you’ll be requiring of your clients by doing some homework. Look for other photographers, in your area, doing similar work for similar clientele. Do research on the internet, make phone calls, ask questions; most photographers, despite the possibility of new competition, will tell you about what they do and how they charge.

- Products & Production

Okay, so now the shoot is successfully shot, and safely backed-up. Files are archived and you’re ready to sell this baby, right? How? The end product you’ll offer is paramount in showcasing the images you put so much time and effort into. In the end, the products from the shoot are all your client is interested in. It’s not that they don’t appreciate the preparation, the time, the effort…the blood, sweat and tears…understandably, they just want their product. This brings us back to honest representation that would have taken place early on in the presentation. If you’ve delivered what has been expected, you’ll have been successful.

- The Legal Mumbo-Jumbo

No matter what type of job you’re taking on, the importance of a contract, a written agreement between both parties, can’t be overstated enough. It will serve as a written blue print of the the expected services you will deliver, and the compensation the client will deliver. And, in what manner these expectations will be fulfilled. You can find sample contracts for a variety of photo jobs online, or, if you’re really immersing yourself in the business, talk to a business attorney who can steer you in the right direction.
No matter what you’re photographing…weddings, portraits, sports, landscapes, interiors, architecture, products, pets…you can be successful if you present yourself honestly and conduct yourself around your clients in a professional manner. Long after the campaign to attract new clients through Search Engine Optimization, Facebook posts, Twitter blasts and word-of-mouth has happened, you’ll be remembered, and either hired or rehired, for the work you’ve done. My experiences have shown that my past clients remember either very good or very poor partnerships. What would you like to be remembered for after a paid shoot?


Tips on selling your photography (via Creative Motion Design, written by Mike Brown) for more of Mike's work see www.facebook.com/PhotographyByMikeBrown


Tips For Winning A Photography Contest

By: Jade Wills

Use Your Photography Passion to Win the Photo Contest


Photo contest announcements always say things like, “Show your passion for photography!” or “Share your dynamic talent for taking pictures”. The clue as to what the contest originators want to see in the photo submissions is found in the descriptions. Creating dynamic photos requires talent and creativity. However, winning a photo contest also requires a willingness to follow the rules and to follow your passion.
Follow the Rules…
Yes, it is true. Life is full of rules. You can submit the best photograph the world has seen and still not win the contest. When this happens, it is usually due to the photographer failing to follow the contest rules. So the first rule for winning a photo contest is to precisely follow the rules.
  • Adhere to the contest theme – If the contest says to submit wedding photos, then you should not submit nature pictures. Oh, it seems so obvious but photos are rejected all the time because the photographer went off theme.
  • Submit the correct number of images – If the rules say you may enter up to 3 images in one category, then do not enter 4 images in 2 categories. It seems so obvious, but people who are proud of their body of work sometimes have trouble narrowing their submissions.
  • Follow the specific directions – Many photography contests provide instructions that specify file formats, image size and other details. It is critical to closely follow the instructions to prevent disqualification.
The truth is that photography judges will require strict adherence to the rules because it enables them to narrow the field of submissions. Any photographer that does not follow all the rules will be disqualified.
Follow Your Passion…
Entering photography competitions is important because it gives you a frame of reference for evaluating your photos. You may think all your photos are perfect, but it is amazing the level of creativity that exists in the world of photography. Contests also provide an opportunity to see diverse bodies of works.
The best place to get ideas on how to win a photo contest is by listening to the advice of past contest winners, professional photographers and contest judges. Following are some of the tips they have offered photographers with a passion for their work.
  • Judges should look at the photo and say, “I wish I had taken that…”?
  • Put your passion into the photo by showing you have a different way of looking at the topic
  • Pay attention to technical details like lighting
  • Make sure all the pictures elements come together in a beautiful composition
  • Only submit high quality photographs
  • Use innovative techniques
  • Add a ‘wow’ factor to the photo
  • Submit pictures that will evoke a viewer response or emotion
  • If multiple photos are allowed, they should be linked in terms of theme and technique but without diminishing creativity
A photo should tell a story. However, the story must be interpretable by the contest judges. This means that whoever is looking at the photo should be able to identify the photo’s meaning or what it is meant to achieve.
There are many different types of photo contests held today. They may ask you to capture particular emotions or conceptualize an idea. Sometimes the theme is left open which gives you an opportunity to truly express your talent without limit. Whatever contest you decide to enter, always remember the two basic guidelines – follow the rules and follow your passion.

Via Creative Motion Design (https://www.facebook.com/cmdwebsites)


Tutorial Tuesday: DIY Doily Banner – Part 1{Best Prop Blog} 

This week we are making a ….

Doily Banner


Materials Needed:

4 – 8″ Doilies (Found HERE for $7.99/Dozen)
1 Package – Bias Tape Extra Wide Double Fold (Under $2 – Wal-Mart, JoAnns, Hobby Lobby, etc)
as well as ….
Straight Pins, Scissors, Thread, Sewing Machine

Step 1: Gather your supplies.
FYI: I used a cutting board, plastic measuring board and rotary blade to make the next step easier.
Step 2: Cut your Doilies into equal halves.
The straight edge ruler and rotary blade made this very quick and easy!
Step 5: Start pinning your doilies into your bias tape.
I found the middle of the bias tape and matched the middle of my first doily to the middle of the bias tape. This ensures that a doily will be in the center of your banner when hanging.
Step 6: Space additional doilies 3″ apart from the center doily and pin into place.
This was extra easy using the gridded cutting mat.
Step 7: I was able to get 7 of the 8″ doilies on the bias tape.
Step 8: Sew the bias tape and doilies together.
This is really easy … Just a straight line! To make the stitching a bit more interesting I used a zigzag stitch.
Step 9: I added a knot at the end of each side. This is completely optional of course.

Here is my DOILY BANNER in action …
I made TWO of the Doily Banners (7 Full Doilies Total & 2 Packages of Bias Tape) for the setup above.

Next week there will be a DIY Tutorial on how to Tea Stain your banners to give them a vintage look!

Via Confessions of a Prop Junkie.  http://confessionsofapropjunkie.com/?p=12226


23rd January 2013

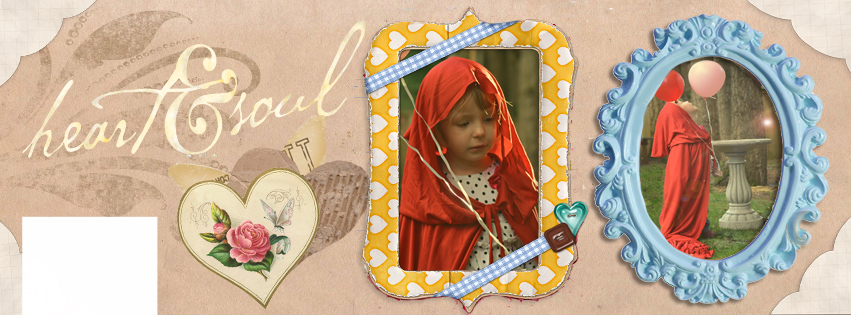
I've just designed some free facebook timelines available for anyone who has Adobe Photoshop.  These were designed in CS5, and are a great way to showcase some of your images for clients or fun!  Click on link below to be directed to my dropbox location. I'd be so grateful if you could visit my facebook page and like me!!! thank you!




Sunday, January 13, 2013

New Etsy Store!!


Well, I've bitten the bullet and just launched my online Etsy store showcasing some of my work.  I'll be honest, I'm terrified! But I'm trying hard to be positive, I've even written down my goals just as Etsy advised, because apparently a goal without a plan is just a wish!

If you feel like stopping by my store then that would be awesome!  here's the link :-)

http://www.etsy.com/shop/Celticcharmphotos


Friday, January 11, 2013

Newborn Photography tips

+I Heart Faces Photography

http://www.iheartfaces.com/2012/07/newborn-baby-photography-guide/

Over 100 of the Best Newborn Baby Photography Ideas, Tutorials & How-To Tips From Around the Web {compiled by I Heart Faces}


10 Tips for Photographing Newborn Babies by I Heart faces......

May 21, 2009
10 Tips for Photographing Newborn Babies
We love photographing newborn babies! There is something sacred about capturing a tiny human so fresh and new. To get you started on your journey of taking photos of babies, Katherine Marie Photography is here with 10 easy tips for capturing these little miracles.

1. Put the babies IN and ON things.
Look around your house for bowls, baskets, plates… get creative. If you can’t find anything you love check out Ikea, Target, antique shops & yard sales for some inexpensive props.
10 Tips for Photographing Newborn Babies
2. Stock up on variety of fabrics and blankets.
Find at least one of each—- high dimension texture (like blanket above), silk, fake fur, loopy/bumpy texture and velvet. You may also like to have several basic solids on hand; black, antique white and your favorite baby shade (pink-blue-mint). Fabrics are essential for backdrops if you have lots of clutter around. Also use fabrics to make a tasty baby burrito or put your fabric over a bean bag, pillow or boppy for an instant “baby poser.”
10 Tips for Photographing Newborn Babies
3. Click with your heart.
Don’t worry if your photographs aren’t technically perfect. Some of my finest work is highly flawed… as long as you love an image, it is a treasure. Photograph baby with something you cherish and/or something that represents you; an heirloom blanket, vintage baseball glove, cowboy hat, wedding rings… the ideas are endless. One of my Texas clients carved this table (above) and we curled baby on top for once in a lifetime shot.
10 Tips for Photographing Newborn Babies
4. Turn off your flash.
Let God’s light do all the work for you. I have lots of expensive & fancy lighting equipment— never used it on a baby, not once. Find a spot in your house that has soft, subtle light. Notice the way the light changes in each room through out the day. You may find exceptional light in the nursery during the morning and then the dining room in the afternoon. Trust me when I say your house has perfect light— it’s just a matter of finding it. I’ve photographed in bathrooms, entry ways, kitchens, garages… you name it!

5. Be ridiculously cheesy and silly.
Costumes aren’t just for Halloween!! Accessorize fully clothed and naked babes in hats, scarves, booties and bows whenever possible.

10 Tips for Photographing Newborn Babies
6. Go black and white.
Nothing beats a timeless and classic black & white photograph. Often fresh newborn skin can be bit blotchy and/or red— black and whites will help hide that! The baby angel (sweet Kennedy above) had flawless skin, yet black and white just worked perfectly here. Let each photograph speak to you– I usually know within the first second if it should be B&W or color… if in doubt print both and pick your favorite.

10 Tips for Photographing Newborn Babies
7. Take the one shot you can’t live without.
For me, every session includes the quintessential hand shot. I love how this pose highlights the smallness of the baby against daddy’s hands. Search your favorite magazines and find YOUR SHOT. Do whatever it takes to capture it.

8. Print your photographs regularly.
This sounds simple enough, but in this age of digital greatness it’s easy to forget about REAL PRINTS. Please don’t use your local pharmacy or home printer for photographs you actually care about. Skip Target and Walmart. Find a local professional camera shop and see if they do in house printing. If they don’t they will recommend one to you.
10 Tips for Photographing Newborn Babies
9. Show some skin. Go for the birthday suit. Tushie shots are a must have. You can easily cover up privates with a blankie. Their skin will never again be so velvety, soft and gorgeous.
10 Tips for Photographing Newborn Babies
10. Have Pee and Poop Patience.
Photographing newborns is a hard, messy job! Take your time and take lots and lots and lots of photos. It’s okay to take 100 shots and only get ONE that really makes your heart sing. My all time favorite photograph is with Emerson on stack of books (see sidebar). This photo took me over two hours to capture. It was worth every second.

11. Enjoy the sleepy heads.
Who isn’t a sucker for sleeping newborn? You’ll find babes to be most easily movable and flexible within the FIRST TEN DAYS of life. Keep a sleeping baby warm and wrapped until you are ready to begin your session. I always ask my clients to turn the heat way up (parents should be sweating by the end of session) to keep baby content. You can also use a hot water bottle or heating pad to warm babies spot in advance.
10 Tips for Photographing Newborn Babies
12. Okay, this was only supposed to be 10 tips…
I can’t stop myself, one more– get AS CLOSE as your camera will allow. Capture tiny toes, drool, wrinkly skin, belly buttons… and capture it close. “Key to My Heart” (above) would not have had the impact if I included the entire baby and a wild background. Always remember this— when you think you are close enough, go a tad closer!
My all-time favorite baby photography book—— Nick Kelsh’s “How to Photograph Your Baby.” LOVE this book! Nick will make you believe that “The most important piece of equipment is your heart.”
Lastly, I promise you, I’m not just saying this because I am one, but if you can afford to hire a professional photographer, do it. I so wish I would have done this when K was a baby. I did the chain studios, but I truly wish I would had someone come to our house when he was brand spankin’ new.
If you really and truly can’t afford a pro, contact your favorite local photographers and tell them about your situation— I can’t tell you how many times I’ve done discounted sessions to help out families. I’d photograph every baby in world if I had time!!! I really believe that most photographers are amazingly compassionate and generous. If you can’t, find anyone (ask a super close friend or family member) to act as your photography assistant during the first days!! New mama’s need and deserve all the help they can get.

Newborn Photography Tutorials | Baby Photography Guide
KMphoto3
Katherine Marie is a fun-loving mama of four. When she isn’t giggling, dancing and creating with her kids she works as a commercial and portrait photographer. Take a peek at her photo journal here.


 Important Soothing Techniques for Newborn Photography
August 3, 2012
Soothing Techniques for Newborn Photography Sessions | I Heart Faces Tutorial

Although I’m not a newborn photographer, I have done a few newborn sessions for friends and have gained some significant experience in the last few weeks with the addition of my third child. Being the baby of a photographer, he’s been initiated into the family with several photo sessions.
Often, the hardest thing about newborn photography is getting the baby to be calm and asleep. Because of this reason, give yourself plenty of time when scheduling newborn sessions. During the session, here are a few tips for soothing the baby.
You can go from this:

To this:

Tip #1| Make sure the room is warm. If you plan on undressing the baby, you’ll want to turn the thermostat up a few degrees so that baby is comfortable and warm.

Tip #2| Use a hair dryer. The noise and warmth of a hair dryer on a low setting at a far distance from baby can give a soothing effect. If it very important to keep the hair dryer several feet from the infant so that the baby does not get too hot or burned. Once baby is settled, or you feel you’ve had the hair dryer on too long, turn the hair dryer away from baby. You’ll need an assistant for this. Don’t try to do this and shoot at the same time. Safety is the highest priority.

Tip #3| Listen to what the baby is telling you. Two of baby’s greatest needs are eating and burping. I’ve found Priscilla Dunstan’s research to be extremely helpful in figuring out what the baby needs. There are very clear indications of when baby needs to eat or when baby needs to burp. Also, because gas that doesn’t get out in a burp in the morning can cause abdominal gas in the evening, try scheduling sessions in the morning.

Tip #4| Be flexible and calm. I tend to get flustered during newborn sessions. I’m not a baby whisperer and sometimes find myself all hot, sweaty, and frustrated. It’s important to relax, keep calm, and have patience. If you’re flustered, it’s much harder to calm baby. If a pose you’re trying to achieve won’t work, try something else. You or your client might be determined to get a hands propping up the face pose, but if that isn’t working, be open to more organic and natural poses. (I sense this is the upcoming trend in baby photography anyway!)
Tip #5| Swaddle. If the naked tooshie pictures aren’t happening, swaddle the baby. It looks cute and it’s comforting for baby.

Tip #6| Embrace the awake face. If baby is calm, but just not falling asleep, go with it.

I hope you’ll be able to utilize these tips to soothe the newborns you’ll be photographing in your upcoming sessions!


Rachel Durik is a photographer located in Southwest Florida. You can learn more by visiting her photography site, Savor Photography, Naples Wedding Photographer, blog, or the Savor Facebook page.

Wednesday, January 9, 2013

Sunday, January 6, 2013

Alice in Wonderland Photoshoot

So at long last I got to fulfill my dream of having an Alice in wonderland photoshoot, it was a LOT of fun.  Just for fun I added some 'behind the scenes' photos too!  It was cold, but awesome!  We started off in my back yard where I had set up my props, (cups and saucers still hanging from my tree from the 'tea party')!  then we headed to the stunning Ridgefield wildlife refuge in Ridgefield, Washington.

Alice in Wonderland


Special Offers!

I'm now booking mini Valentines sessions, for $75 dollars you get a 30 minute shoot, 10 images on a disk, a print release letter and as a bonus I'll provide you with a custom designed facebook timeline from your session to show off your images!  If you mention my blog I'll give you a free 8 x 10 print from your session!!